Best 10-Step Guide on How to Create Email Signature in Outlook

For those thinking about starting a business but uncertain where to begin, learning to create an email signature in Outlook is a valuable step. In the digital world, a professional email signature is a necessity for any aspiring entrepreneur.
Your email sign-off is your virtual calling card, displaying who you are, what you do, and how to contact you.
If done right, knowing ‘how to create email signature in Outlook’, not only adds professionalism to your emails but also helps build brand recognition.
What is an Outlook signature?
An Outlook signature is a customizable block of text that is automatically added to the end of your emails.
It typically includes your name, contact information, and any other important details you want to share. By creating an Outlook signature, you can showcase your professionalism and make it easier for recipients to get in touch with you.
In this guide, I will walk you through the step-by-step process of creating an Outlook signature, ensuring that you can effortlessly add a personal touch to your emails.
Designing Your Signature in Outlook Desktop
Let’s talk about designing your custom email signature in Outlook.
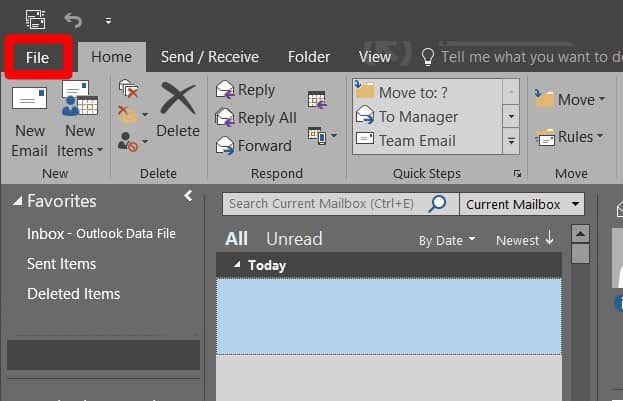
1. Open Outlook Desktop
2. Click on ‘File’ in the menu bar
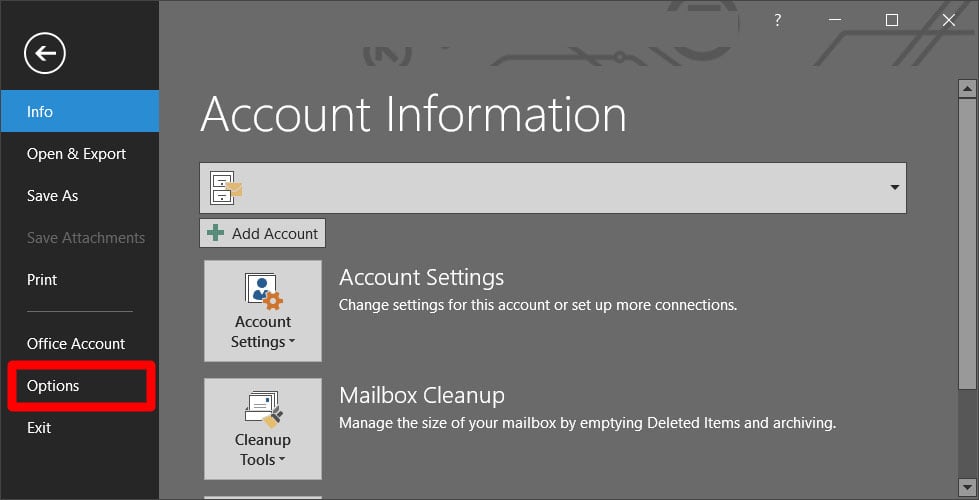
3. Click ‘Options’
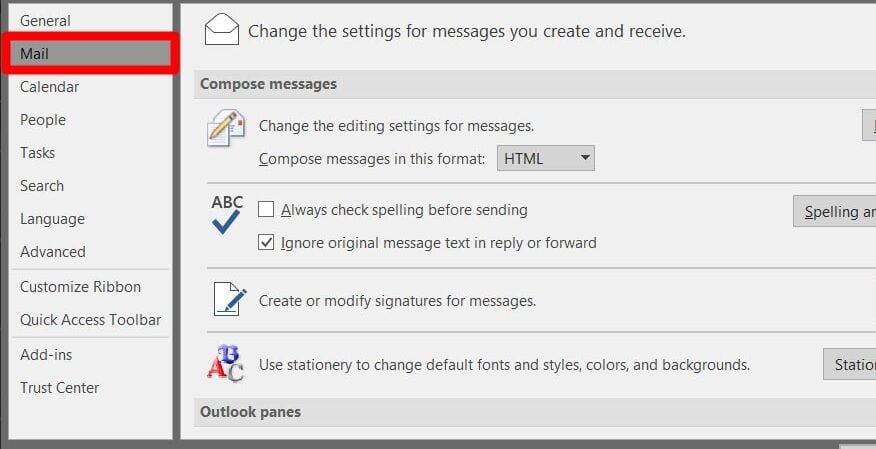
4. Click ‘Mail’ in the left menu
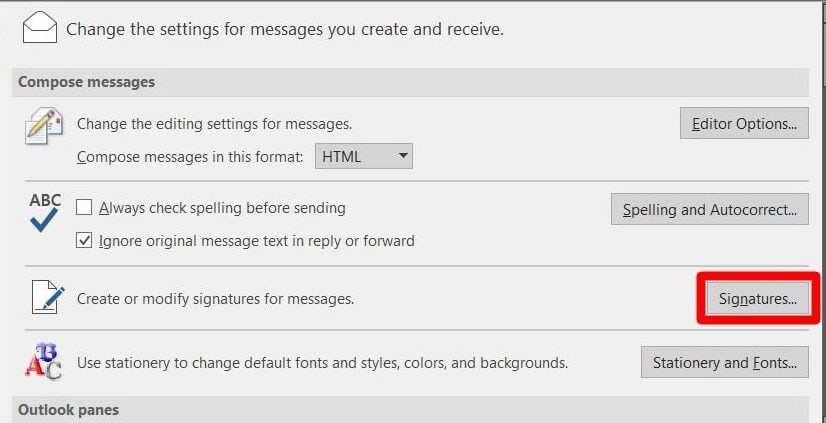
5. Click ‘Signatures’
6. Click ‘New’ in the ‘E-mail Sigunature’s’ tab
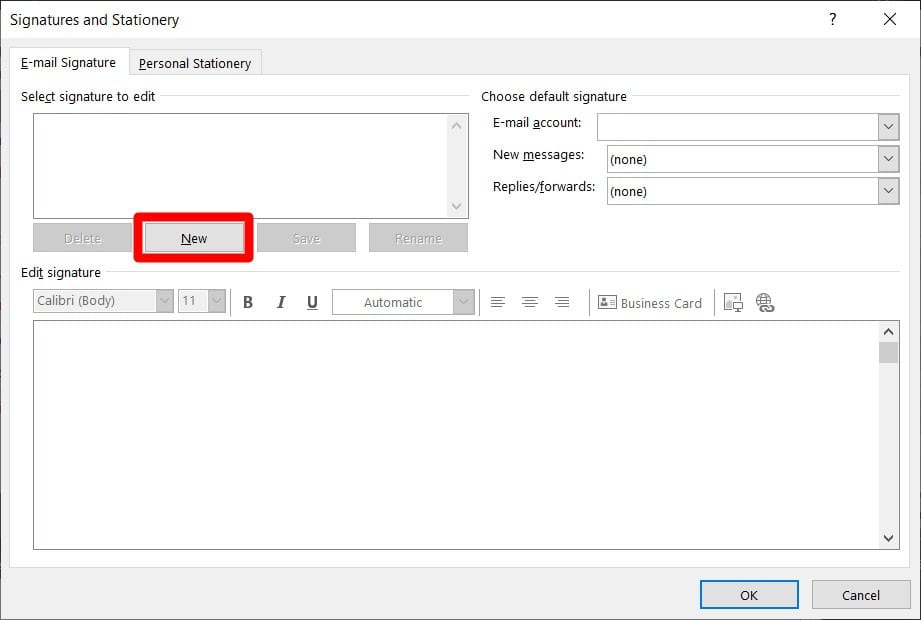
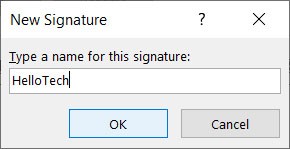
7. Type in a name for the signature
8. Type your email signature in the ‘Edit Signature’ box

9. Click ‘OK’ when complete
Congratulations! You’ve created your new signature.
Setting Up Default Signatures in Outlook
In the world of email communication, having a default signature set up can save you time and maintain consistency, especially if you’re using Microsoft’s popular platform – Outlook.
To get started with this feature, head over to the Signature dialog box.
- Under ‘Choose default signature’, pick your preferred email account from the drop-down menu.
- Then, for both ‘New messages’ and ‘Replies/forwards’, select which pre-created signatures should be automatically added.
If there are multiple accounts on your Outlook setup, don’t forget to repeat these steps for each one. Remember that auto signatures need individual configuration per account.
Quick Designing Your Signature in Outlook 365
1. Sign in to ‘office.com’
2. Click the ‘Gear’ icon in the top right
3. Click ‘View all Outlook Settings’
4. Click ‘Compose and reply’
5. Enter your email signature in the ‘Email Signature’ box.
Optional
Adding new signature as default signature.
Quick Designing Your Signature in Outlook For Mac
1. Open Outlook
2. Click ‘Outlook’
3. Click ‘Preferences’
4. Click ‘Signatures’
5. Click the ‘+’ button
6. Type a name for the signature
7. Click the signatures name
8. Click ‘Edit’
9. Type your new signature
10. Click ‘Save’ when done
Optional
Adding new signature as default signature.
Using Pre-Designed Templates
If design isn’t your strong suit or you’re pressed for time, pre-designed templates are a fantastic resource. They offer an array of styles and layouts that could serve as inspiration for your own unique creation. You’ll find these options within the signatures dialog box under ‘New’.
You also have full control over how text appears with the mini formatting bar for text alignment at the top of this same dialog box where font size, style, and color, along with bolding, italicizing, or underlining, can be adjusted according to preference.
Besides textual elements like name, job title, and contact information, adding images such as company logos or social media icons adds visual appeal. To add a photo, simply click on ‘Picture’, locate the desired image file from computer storage, then insert it into the template layout.
Making The Most Of Your Default Signatures
While setting defaults is indeed an efficiency booster, here are some tips worth noting:
- Consistency Is Key: Your custom email signature should mirror your brand image across all platforms.
- Variety Matters: Create diverse signatures tailored towards different purposes like internal communications or client interactions.
- Simplicity Rules: An elaborate Outlook window filled with fancy graphics might seem tempting, but remember when it comes to professional correspondence, simplicity often trumps complexity.
Tweaking Your Auto Signature Settings In the Future
No worries if, after setting them up, you decide they need changes. Just navigate back into those same settings within Outlook’s interface where edits can easily be made by selecting “edit” next to the desired field.
With such flexibility at hand, managing digital correspondences through Outlook becomes even more convenient and efficient.
Key Considerations for Successfully How to Create Email Signature in Outlook
Crafting a memorable email signature is more than just slapping your name and contact info at the end of every message. It’s about creating a concise, yet informative sign-off that leaves recipients with a lasting impression.
Contact Details: More Than Just Your Name
Your full name? Check. Job title? Double-check. Company URL (without a hyperlink)? Triple check. And don’t forget your phone number and professional email address either.
You might also want to consider including other relevant links such as LinkedIn profiles or online portfolios where potential clients or partners can learn more about what makes you tick.
Job Title & Company Info: Giving Context Where It Counts
Including these tidbits gives people on the receiving end of your messages immediate insight into who you are professionally while providing some much-needed context regarding who exactly it is they’re communicating with – especially if they’re outside of your organization.
Taking It To The Next Level
So, you’ve got a basic email signature set up in Outlook. That’s fantastic. But did you know that with just a few more steps, your simple auto signature can be transformed into an engaging and interactive tool? By adding advanced features like images or social media icons to your custom email signature, it becomes not only visually appealing but also creates additional touchpoints for communication.
Adding Social Media Icons To Your Signature
In the modern digital age where business is increasingly conducted online, incorporating clickable social media icons directly into your email signatures opens new doors of connectivity. This subtle addition enhances the aesthetic appeal while simultaneously driving traffic toward your various online platforms.
To add these eye-catching elements to your Outlook email message signatures:
- Navigate to the Edit Signature box.
- Choose ‘Include Picture’ from the toolbar at the peak of the dialog window.
- Browse and select image files representing each respective platform (Facebook logo for Facebook page link, etc.).
Moving on to linking these inserted pictures back to their corresponding profiles:
- Select one picture, then utilize the ‘Hyperlink’ button from the toolbar to paste in its corresponding profile URL when prompted.
- Paste the URL of the associated profile when prompted by the dialog box.
The beauty here lies within this integration – offering another layer of accessibility without overwhelming recipients.
Remember: A robust yet concise outlook automatically adds professionalism while serving as an effective marketing tool – take some time perfecting yours.
Exploring Alternatives to Creating an Email Signature in Outlook
If you’re searching for alternatives beyond the confines of Outlook, we’ve got your back. There are plenty of robust tools available online that can help you create stunning email signatures with minimal effort.
Diving into HubSpot’s Email Signature Generator
An excellent alternative is HubSpot’s Email Signature Generator. This tool provides simplicity and convenience by allowing users to craft professional-looking signatures without any technical skills.
Simply inputting your data, picking from a range of templates and designs, and then copying and pasting the produced code into your email program is all it takes to make use of this tool.
The beauty of using this tool lies in its straightforwardness. With just a few clicks, you have yourself a custom-made signature ready for use. It also offers advanced features such as social media icon integration, which not only enhances aesthetics but also drives traffic toward your digital platforms.
Beyond HubSpot’s generator, there are other noteworthy options like WiseStamp, lauded for its extensive template library; or perhaps MySignature, praised for its user-friendly interface; even NEWOLDSTAMP has earned recognition offering both free and premium services depending on what suits users’ needs best.
In essence, while setting up auto signatures directly via Outlook may be convenient due to familiarity with the platform, venturing outwards to these external tools could open doors towards designing more sophisticated yet easy-to-create email signatures. So why wait? Give them a whirl.
Conclusion
Creating an email signature in Outlook is a simple yet effective way to elevate your professional communication.
You’ve learned the step-by-step process, from opening the message menu to selecting and designing your signature.
We explored how you can use pre-designed templates or customize fonts, colors, and text alignment for that unique touch.
The importance of adding essential contact details like job title and email address was emphasized, along with ensuring its compatibility across all devices.
Adding images or social media icons was discussed as advanced features to enhance your signature’s look while driving traffic towards your platforms.
And if Outlook isn’t quite right for you? We even touched on alternatives like HubSpot’s Email Signature Generator!
Now that you’ve created a stylish email signature, it’s time to take your professional image to the next level with an electronic business card.
With the world becoming more digital by the day, you can’t afford to be left behind.