Easy Java Install Guide for Business Owners (5 Steps)

Hey there! If you’re looking to streamline your software development, especially in areas where workflow automation can play a crucial role, you’re in the right place.
You have come to the right place! As someone who struggled with Java installation in the past, I understand the frustration and time wasted trying to figure it out on your own.
That’s why I want to share with you everything you need to know about a Java install.
By the end of this post, you’ll have a deeper understanding of what Java is and the key considerations for a successful Java install.
So, buckle up, and let’s dive in!
What is Java
Before we get started, let’s dive into the fascinating realm of Java and explore why it has become such a popular choice for application development.
Java, an incredibly versatile programming language, empowers developers to craft an extensive array of innovative applications, including cutting-edge desktop software, dynamic mobile apps, automation, and robust web servers.
Its remarkable cross-platform compatibility bestows the remarkable advantage of running Java applications seamlessly on diverse operating systems such as Windows, macOS, and Linux, enabling an all-encompassing reach and accessibility.
Reasons You Need to Know Java Install
If you want to enhance your software development skills, then the opportunity to learn Java is a critical step. Java is a widely used programming language known for its versatility. The Java runtime environment is pivotal in the creation of diverse applications, websites, and games.
Its powerful features, extensive libraries, and Java SE development kit have made it a preferred choice for numerous renowned companies, such as Google, Amazon, and even NASA, enabling them to deliver groundbreaking solutions and facilitate innovation on a global scale.
However, the install Java is not a simple, straightforward process; it requires acquiring specific tools, and knowledge, and following carefully defined steps to ensure successful setup and execution on your computer system.
Yet, the effort put into mastering this powerhouse language is well worth it. By embracing the journey to learn Java, you empower yourself to unlock a world of endless possibilities, expand your skillset, and open doors to exciting opportunities in the vast landscape of software development.
Moving forward, let’s dive into Java installation – a crucial step for enhancing your capabilities in automation-focused businesses. There are a few different ways to do this, depending on the operating system you’re using.
Step-By-Step Guide for Java Install on Windows
Step 1
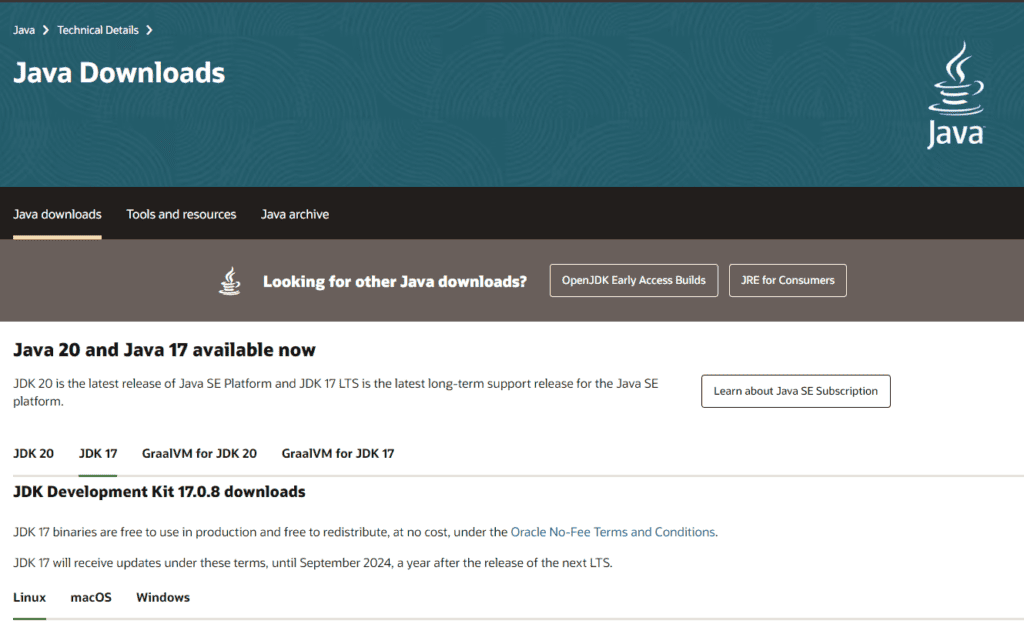
Go to the Java download page on Oracle’s website
Step 2
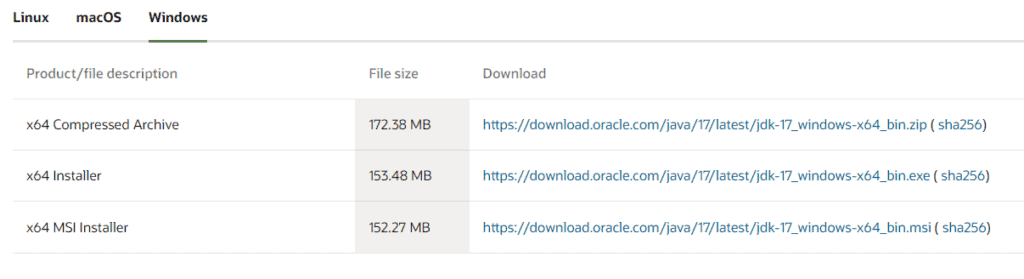
Click the download link of the Java installation files you wish to install (e.g., Java SE 17.0.8), accept the license agreement, and then click the “Save” button to download the Java installer file.
Step 3
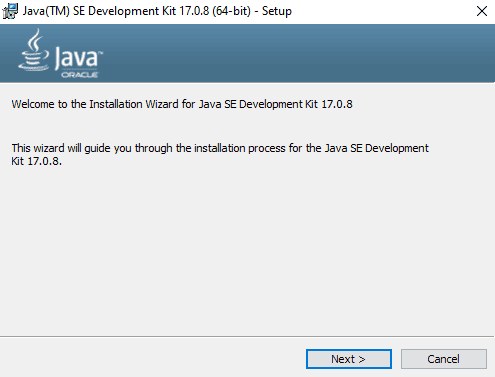
Once the new file is downloaded, double-click it to run the Java installer.
Step 4
Follow the prompts on the installer screens to install Java. Be sure to choose the correct Java version for your operating system (32-bit or 64-bit) as there are multiple versions.
Step 5
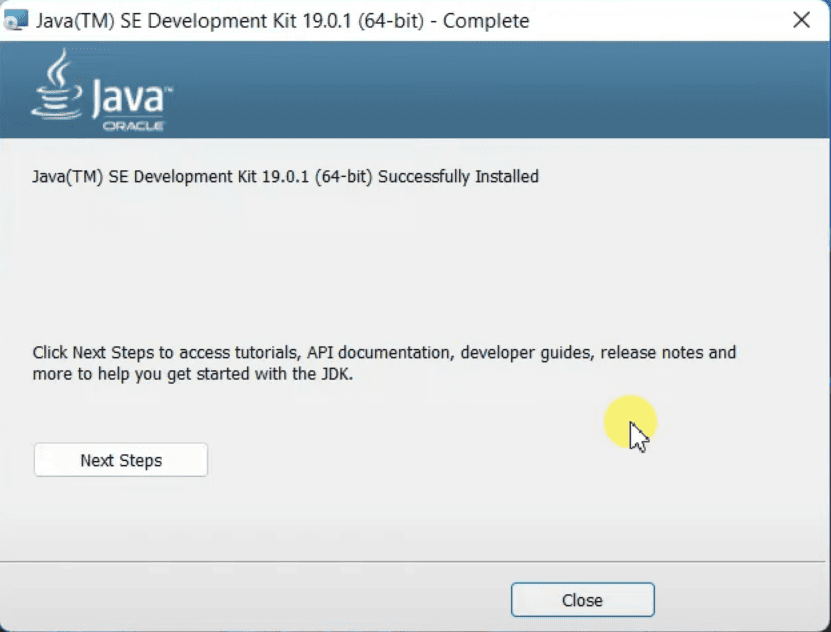
Once Java is installed, you should see a confirmation message. You may need to restart your computer for the changes to take effect.
Step-By-Step Guide for Java Install on MacOS
- Go to the Java download page on Oracle’s website
- Click the download link of the Java installation files you wish to install (e.g., Java SE 17.0.8), accept the license agreement, and then click the “Save” button to download the Java installer file.
- Once the file is downloaded, double-click it to run the installer.
- Follow the prompts on the installer screens to install Java. Be sure to choose the correct Java version for your operating system (macOS).
- Once Java is installed, you should see a confirmation message.
Step-By-Step Guide for Java Install on Linux
- Open a command prompt and type the following command to update your package index:
sudo apt update - Type the following command to install the default JDK (Java Development Kit) package:
sudo apt install default-JDK - Type “Y” and press enter to confirm the installation.
- Once Java is installed, you can verify the installation by typing the following command:
java -version - You should see a message showing the version of Java you installed.
Congratulations! You’ve successfully installed Java
Key Consideration for a Successful Java Install
Before embarking on your Java installation journey, there are several important considerations to keep in mind. First and foremost, verify that your computer meets the necessary hardware and software requirements for Java. You can easily check the specific system requirements on the official Oracle website, which will ensure optimal compatibility.
Secondly, it’s crucial to ensure that your computer has ample storage space available to accommodate the Java installation. Having sufficient disk space will guarantee a smooth and hassle-free installation process.
Lastly, it’s essential to identify the specific Java version that is compatible with your software. Different software programs may have varying Java version requirements, so it’s important to determine the appropriate Java version to avoid any compatibility issues.
By taking these factors into account, you can proceed with confidence on your Java installation journey.
Take it to the Next Level
If you want to elevate your Java installation to new heights, it’s essential to have a solid grasp of the various Java Development Kit (JDK) versions. A Java Development Kit serves as a comprehensive software development kit for creating Java programs.
The Java JDK includes a range of options including OpenJDK, Oracle Java, and Amazon Corretto, each with its own unique features and benefits.
Delving further into the world of JDK, OpenJDK is an open-source implementation of the Java SE Platform, providing flexibility and community-driven enhancements.
On the other hand, Oracle Java offers additional features and support tailored for enterprise environments. It brings a commercial license along with long-term support options and performance optimizations.
Amazon Corretto, with its free and multi-platform nature, is worth considering for cloud-based Java projects.
When it comes to improving your software development endeavors, meticulously researching and delving into customer reviews before selecting the ideal JDK version for your needs is of utmost importance.
Taking the time to make an informed decision will undoubtedly pave the way for optimal outcomes in your Java ventures. So, explore the JDK landscape, weigh the options, and choose wisely to unlock the full potential of your Java programming.
Alternatives
If the idea to download and install Java intimidates you, don’t worry! There are alternative programming languages out there that you can explore. These alternatives include Python, Ruby, PHP, and C++. Let me provide you with a brief overview of each language:
Python
Python is widely recognized for its simplicity and user-friendly programming. It offers a clean and readable syntax, making it a great choice for beginners and experienced developers alike.
Ruby:
Known for its elegant and concise code syntax, Ruby emphasizes simplicity and productivity. Its focus on developer happiness has made it a popular choice for web development and scripting.
PHP
PHP is a powerful programming language designed specifically for web development. It offers a wide range of frameworks and libraries, making it highly versatile for building dynamic and interactive websites.
C++
If you’re looking for more low-level control and performance, C++ is an excellent option. It is commonly used for system software, game development, and other applications that require efficient memory management.
So, if Java doesn’t resonate with you, consider exploring these alternative languages based on your specific needs and preferences.
Conclusion
Learning to download and install Java is not as daunting as it may initially seem. With the right knowledge and a few simple steps, you can quickly and efficiently set up Java on your computer or a Java virtual machine.
It’s important to keep in mind that Java is a robust and versatile programming language that can greatly enhance your software development capabilities. By installing Java, you gain access to a vast array of libraries, tools, and frameworks that empower you to create powerful and feature-rich Java programs.
Throughout your Java installation journey, it’s crucial to ensure that you choose the appropriate version of Java that best suits your needs and matches the requirements of your projects.
You can choose from various editions, such as Java SE (Standard Edition) for general-purpose development, Java EE (Enterprise Edition) for building enterprise applications, or Java ME (Micro Edition) for developing applications for mobile and embedded devices.
Installing Java involves a few simple steps, such as downloading the appropriate Java Development Kit (JDK) program files, running the installation executable file, and configuring the necessary environment variables. By following these steps, you’ll be able to harness the full potential of Java and unlock countless possibilities in the world of software development.